Gardeners Club The Gardeners Club is a free to join online club for everyone with an interest in gardening and gardens.
Related Articles


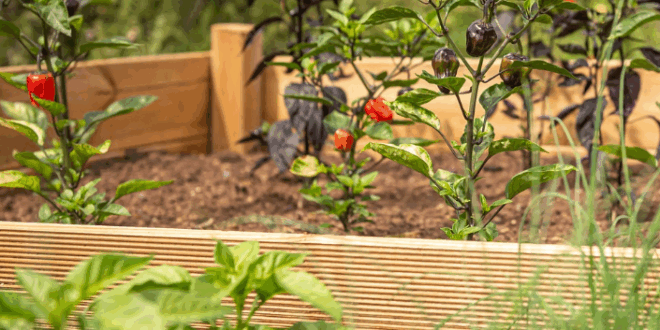
If you’ve been thinking about starting a vegetable patch or expanding your flower garden, a raised bed is one of the easiest and most rewarding DIY projects you can complete in a single weekend. Raised beds offer better soil control, improved drainage, easier access, and fewer weeds—all great benefits whether you’re a beginner or seasoned green thumb.
Here’s a step-by-step guide to help you build your own simple raised bed and get growing fast.
🌿 Why Choose a Raised Bed?
- Improved Soil Quality – You control the soil mix, ideal for poor or compacted native soil.
- Better Drainage – Helps prevent root rot and waterlogging.
- Easier on the Back – Less bending means less strain, especially for older gardeners.
- Fewer Weeds and Pests – Raised edges act as a natural barrier.
- Earlier Start in Spring – Soil in raised beds warms up faster than ground-level beds.
🧰 What You’ll Need
Materials for a 4×8 ft bed (standard beginner size):
- 4 wooden boards (2x 8ft and 2x 4ft, 6″ to 12″ tall, untreated softwood or cedar)
- 4 corner stakes or wooden posts (about 12–18 inches long)
- Exterior wood screws (2.5–3 inch)
- Landscape fabric or cardboard (optional, for weed suppression)
- Good quality soil or compost mix
Tools:
- Power drill or screwdriver
- Saw (if you need to cut boards to size)
- Tape measure
- Level (optional)
- Shovel or rake
🏗️ Step-by-Step Instructions
1. Choose the Location
Pick a spot with 6–8 hours of sunlight if you’re planting edibles. Ensure it’s relatively flat and easy to access from all sides.
2. Prepare the Ground
Clear away weeds and grass. You can lay cardboard or landscape fabric to suppress weeds further. This also encourages worms to help break down the existing soil beneath.
3. Assemble the Frame
- Lay your boards in a rectangle.
- Screw the shorter boards to the ends of the longer boards to create a box.
- Drive the corner stakes into the inside corners for extra strength.
- Screw the boards to the stakes.
📝 Tip: Use untreated wood to avoid chemicals leaching into your soil. Cedar or larch naturally resists rot.
4. Level the Frame (Optional)
Use a level and adjust the soil underneath to make sure your bed sits evenly. This prevents water from pooling at one end.
5. Fill with Soil
Use a mix of topsoil, compost, and organic matter (a 50/50 or 60/40 mix works well). You can also buy pre-mixed raised bed soil from garden centers.
🪱 Add worm castings or organic fertilizer to boost initial nutrients.
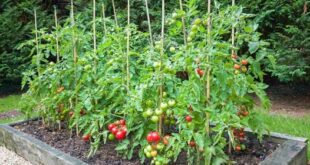
6. Water and Plant
Water the bed thoroughly to settle the soil. Then, plant your seeds or seedlings according to the season.
🌱 Maintenance Tips
- Top up with compost each season to refresh nutrients.
- Install a net or mesh if you’re in an area with rabbits or birds.
- Consider crop rotation if growing veggies to prevent soil depletion.
🧑🌾 Final Thoughts
Building a raised bed is a satisfying weekend project with lasting benefits. In just a few hours, you can set up a productive, manageable, and attractive growing space. Whether you’re aiming for juicy tomatoes, colorful blooms, or crisp salad greens, a raised bed is the perfect foundation.
So grab your tools, gather your materials, and get growing—your weekend project could become your favorite part of the garden!