Gardeners Club The Gardeners Club is a free to join online club for everyone with an interest in gardening and gardens.
Related Articles


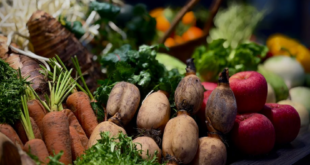
Fresh vegetables picked from the garden when they are at their very best are the culmination of all the hard work and skill, which you, the gardener has put into your garden or allotment.
Eating food produced in your own garden provides you with the satisfaction of knowing exactly where the food has come from and how it has been handled/grown – unlike vegetables from the supermarket.
Here at Gardeners Club we have put together a useful step by step guide full of useful hints and tips to help you grow delicious organic vegetables.
Preparing the plot
Choose a spot that gets plenty of sun; one that ideally faces south. Mark out the bed and dig the area to break up the ground and improve the drainage. Add manure or other organic matter; use home-made compost or a commercial soil improver.
Use narrow, raised beds as these make gardening less tiring – they take a lot of the strain out of gardening and reduce the amount of bending. They also increase the soil depth and/or drainage for shallow or poorly drained soils.
Prepare 15-30cm deep beds that are narrow enough to allow one to reach the centre from both sides (approximately 1m maximum). To keep the soil in position, edge the beds with 15-30cm deep planking. Extra top soil or organic matter can be added to bring the soil up to the top of the planks. The beds should then be double-dug and organic matter incorporated into the soil. Heavy clay soils would benefit from annual single-digging, with an application of organic matter to the base of the digging trench.
Divide your plot into modules, as this makes the beds easier to maintain than conventional row systems. The increased plant densities also help to reduce weed growth. Divide the area into a grid system and treat each square or module as a separate production area.
Tools
Tools should be easy to use and not cause any undue strain. There are tools to suit many different needs and it is essential to take time to select the right ones for you to avoid putting unnecessary strain on your back.
Mulches
Use an organic mulch such as garden compost, shredded bark, spent hops, composted grass clippings and farmyard manure to reduce weed growth. Organic mulches can help condition the soil and act as a source of nutrients for the crop they are often more effective than manufactured materials such as polythene and carpets.
Crop rotation
For crops to do well, it is important that your vegetable plot is well prepared and that you use a rotation system to avoid the build up of pests and diseases.
Cloches
Cloches help to extend the growing season and protect the plants. They can be bought in most garden centres.
It is very simple to make your own cloches – Cut a length of strong wire into hoops and insert them at regular intervals down the bed. Fix polythene to a firm stake at one end and stretch over the wire hoops, securing at the other end.
To make the tunnel really secure, tie a piece of string to one of the end hoops, across to another couple of hoops and secure the other end. This keeps the polythene firmly in place but allows you to lift the sides for watering and thinning of plants.
Growing vegetables in containers
Container vegetable growing is a good way to grow your own if you live in a flat or have very little or no garden. Use plastic containers as these hold moisture better than clay or earthenware ones, so less watering is needed. Put the containers in a good position for getting rain and avoiding drying out. Food for plants in containers gets used up so they need regular feeding, preferably on a little and often basis with liquid feeds.
Weather conditions can be a problem with containers, e.g. hard frosts may crack clay containers and damage the roots of plants.
When planting up containers, take care not to group the plants too closely. The plants will grow and can get overcrowded.
Top 10 tips
- Avoid sowing in low lying areas which may become water-logged.
- Raise the vegetable plots for easier access.
- Storing vegetables for use over winter is a very useful way of having your own garden vegetables for much longer than their natural growing season.
- Paper cups make excellent plant pots for starting seeds or cuttings in; don’t forget to punch some drainage holes in the bottom first.
- To clear an area of weeds or grass, cover it with hessian-backed carpet or plastic, weighted down at the sides. After a growing season the area should be clear.
- Lay old carpets between beds for a more level path that will suppress weed growth.
- Grow vegetables in containers – choose smaller varieties.
- Avoid using F1 hybrids – the seed is more expensive and the vegetables will mature all at once. Also, seeds saved from plants grown from F1 Hybrid seed will not be true to type and are likely to have poor vigour.
- Keep birds off your seedbeds with scarers. Use old tin foil pie dishes or plastic bags tied between canes.
- Used plastic lemonade bottles provide good cloches for small transplants and used mineral water bottles work well for larger transplants. Simply cut the bottom off the bottle and push it into the soil around the plant. Don’t forget to leave the top off, as this allows some ventilation and an easy way of watering without removing the bottle.
Asparagus
Plant asparagus early in the spring, before growth occurs from the crowns. Dig a hole about 6 inches deep. Place a small mound of earth in the hole; then set the plant on the mound so that the roots hang down and are evenly spread out in the hole. Cover the crowns with 2 inches of topsoil. As the shoots elongate, add more and more soil until the hole is completely filled. The roots should be 5 inches below the soil surface. Asparagus should be grown in the part of the garden with maximum sun exposure. It is a deep-rooted plant and requires a rich, deep soil that is well prepared before planting. Asparagus plants respond well to a good moisture supply. They require 1 inch of water per week from May through October. Asparagus plants will crop in the second year after planting.
Broccoli
Broccoli prefers a heavy (not pure clay though) fertile soil in full sun or semi-shade. Sow from April to May, about 3 inches apart in lines 2 feet apart. Cover the seeds with half an inch of crumbly soil and water well. The seeds should germinate in 10 days or so. When the seedlings appear, thin them to 22cm 9 in apart. Expect harvesting two to three months later.
Brussel Sprouts
Brussel sprouts should be sown in a firm soil. They dislike acid soils which can make them more susceptible to club root. Sow in mid spring 12mm deep in a prepared seed bed, 1 cm apart. Leave 23cm between rows. Transplant April to May when 15cm tall, allow 80cm between the plants. Young plants need to be kept well watered.
Cabbage
Sow seeds thinly 1cm deep, thin to 15cm apart and transplant when 7.5cm high to a spacing of 60cm. Early sowings can be made indoors.
Cabbage should be harvested before the first frosts. Prior to cutting, the outer leaves are stripped off. This is done by placing your hands around the cabbage head and pushing down, leaving a tight clean head sitting on the stalk. Once all the outer leaves have been removed, the cabbages can be cut.
Carrots
Carrots prefer a light soil which has been improved with lots of well-rotted organic material fully dug into the soil. They can be sown from February through to July. Sow seeds very thinly, direct spring onwards in succession to summer, 1cm deep rows 15cm apart, thin the young seedlings to 10cm apart. When the foliage begins to wilt and shrivel up, the carrots have reached maturity.
Carrots should not be harvested until there has been at least one frost; this is to ensure that they have become dormant and the roots are cold. Use a fork to get the roots up and then remove the carrots by hand.
Early crops can be produced by sowing seed early indoors & transplanting under cloches
Cauliflower
Dig the soil deeply with the addition of manure or compost during the late autumn/winter some months prior to planting. Sow seeds 1cm deep, thin out to 7cm apart, transplant up to 60cm apart when the plants have made 5-6 leaves. Sow January to February under glass and sow outdoors March to May.
Onions
Onions prefer a sunny position with a rich but light soil, however they will do well in most soils as long as it is firm. Maincrop onion sets should be sown in March, 4 inches apart in rows 1 foot apart to a depth where only the very tips of the sets are just showing through the soil. Dig a hole in the soil with a trowel and place them in the hole with their necks uppermost. Watering may be required in dry periods up till mid-August, after that, do not provide any water as this may delay the maturing process.
Onions are ready for harvesting a week or two after the foliage starts to turn brown and shrivel up.
Peas
To grow good peas and mangetout the soil needs to be of good structure with plenty of organic matter and a pH of 6.5. It does not need to be too fertile.
Sow from February to June, under cloches if necessary, in shallow trenches about 6″ wide and 2″ deep. Scatter the seed evenly, so that there is roughly 2″ between seeds, in the trench and fill by raking soil over the seed. Peas need to be supported – tie the plants to canes as they grow. The plants should be pinched out when they reach the top to encourage shoots further down the plants. Peas are normally ready for harvest three weeks after flowering.
Potatoes
Before planting out, potato seeds need ‘chitting’. This is done by placing them in seed trays or egg cartons. Leave them in a light place at about 10F, for about 6 weeks; they will then sprout small green shoots.
Plant the tubers 5″ deep, being careful not to damage the shoots. Space early varieties 12″ apart with 24″ between the rows. Later maincrop varieties should be planted 15″ apart with 30″ between the rows.
The ground has to be dug over – preferably by double digging, and organic matter incorporated. The trench then has to be dug to take the seed, they have to be earthed up and then dug out of the ground.
All varieties of potato are pretty tolerant and will grow in any soil but will do better in an organic rich one that is slightly acid. Potatoes are not hardy and a frost will kill them.
Early potatoes (new potatoes) should be harvested just as the flowers are opening. Second earlies can be lifted as required, or if the space is needed, the whole crop can be lifted and left on the soil surface for 48 hours to allow the skins to harden. Green potatoes should not be eaten as they contain the poisonous alkaloid solanine.
Runner beans
Runner beans should be planted using a trench 2 feet wide that has been double dug and had plenty of manure incorporated. They grow to over 6 feet high, so some form of support will be needed. This support must be absolutely rigid – use 8′ or 10′ canes, using one cane for each plant, to make a framework.
Runner beans will be ready for picking from midsummer onwards until the first frosts. Check the plants regularly and pick the beans while they are young and tender. Leaving them too long before picking will result in tough, stringy beans.
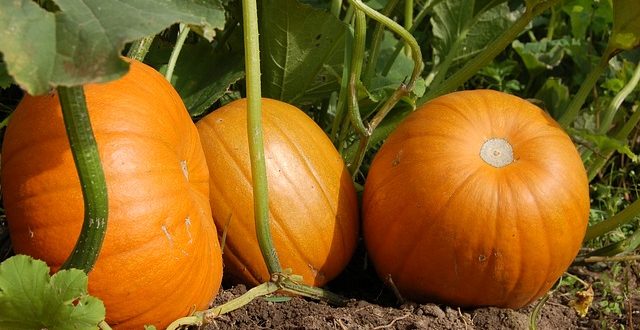
Squash
This is a broad family ranging from courgettes through to giant pumpkins. Plant bush plants about three feet apart. Prepare the bed 2-3 weeks in advance, dig a whole about one foot deep and wide. Add compost and manure before replacing the soil. Keep the soil around the plants watered. Once the fruits are beginning to swell feed regularly.
Swede
A well dug, weed free area is all that is required for Swede although some well prepared compost is beneficial if your soil is poor or dries quickly in the summer.
As soon as the seedlings are big enough to handle, thin out to 1 plant every 12 inches. Keep weed free in the early stages. Swedes are winter hardy so can be left in the ground until required.
Sweetcorn
Grow sweetcorn in a sunny position that is not too windy. Use well drained soil, pH 5.5 – 7. Sow in individual pots during April. Sweetcorn seeds needs chitting (germinating) before sowing – place them in a damp, warm place. Use easily degradable pots so the roots don’t suffer from being transplanted.
Harden off and plant out in late May – early June. Plant in a block instead of a long row as this aids pollination. Plant seeds 12-18″ apart. Watering is usually only necessary when the flowers appear. Stake the plants if they are exposed to the wind and pull soil around the roots if they become exposed.
To test when cobs are ready pull back the leaves and prick a grain with a fingernail. Some liquid will emerge. If it is creamy, the cob is ready. If it is watery, leave it a few days.
Tomatoes
Place your grow bag against a sunny wall or inside your greenhouse. Plant three equally spaced tomato plants in your grow-bag and give them a good watering. Make sure that the tomato plant has good stability and support by tying to cane supports.
As the plant starts to grow, pinch out any side shoots that start to grow away from the main stem. This stops the plant from wasting any energy and keeps it in a manageable shape. Keep tying the main stem as it grows to ensure the plant is well supported.
When the plants have produced 4 sets of little flowers, pinch out the top of the plant so that it doesn’t grow any further.
Tomatoes should be picked when they are in full colour. If you wish them to ripen quickly, lift them into a warm place in full daylight, such as a greenhouse, to ripen. If you don’t have the space, then pick any fruits showing some colour and place them on a sunny window sill to ripen.